Drawing animals can be a fun and rewarding activity for artists of all levels. Whether you are a beginner looking to improve your skills or an experienced artist wanting to try something new, drawing a mouse can be a great starting point. These cute and endearing creatures have distinctive features that make them both challenging and enjoyable to draw.
In this comprehensive guide, we will go through step-by-step instructions on how to draw a mouse effectively. From outlining the basic shapes to adding details and textures, you will learn the techniques needed to create a lifelike representation of a mouse on paper.
Materials Needed:
Before we begin, make sure you have the following materials handy:
– Pencil: for sketching and outlining
– Eraser: for correcting mistakes
– Paper: preferably a sketch or drawing paper
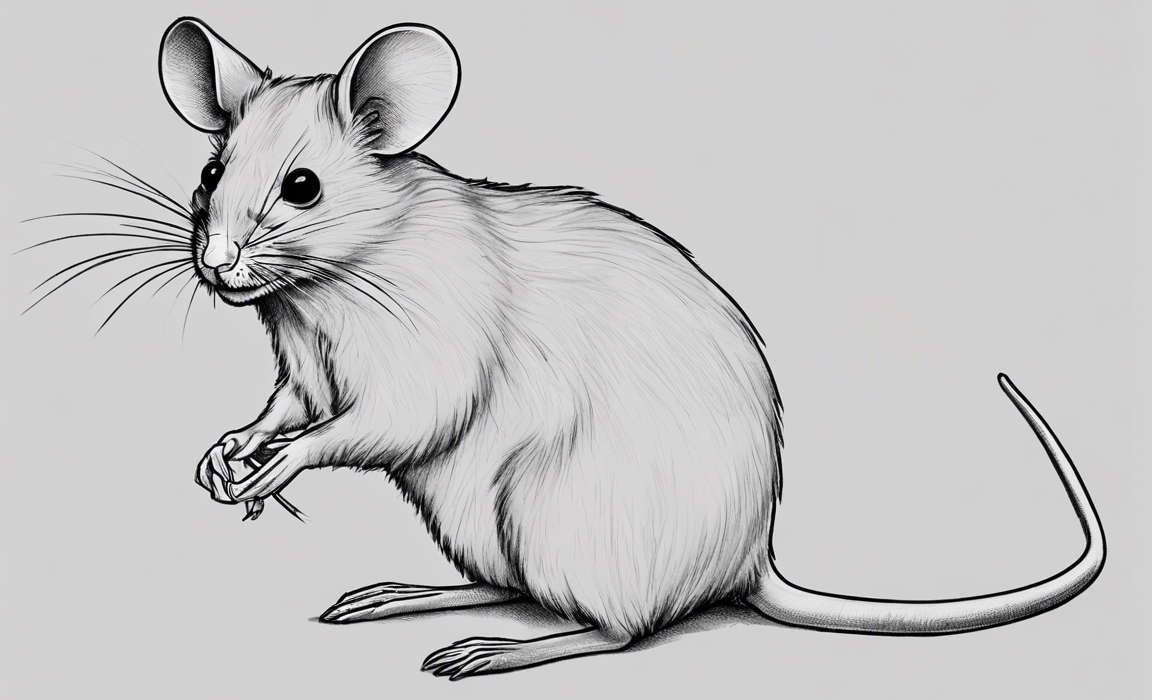
– Reference Image: to guide you through the drawing process
Step 1: Basic Shapes
To start drawing a mouse, begin by sketching the basic shapes that will serve as the foundation for your artwork. Use a light pencil for this initial step to easily make changes as needed.
– Begin with an oval shape for the body.
– Add a smaller circle for the head.
– Connect the two shapes with curved lines to create the neck.
Step 2: Body and Head
Once you have the basic shapes in place, start refining the body and head of the mouse.
– Extend the oval shape to create the belly of the mouse.
– Add two smaller ovals on either side of the head for the ears.
– Sketch the snout using a small triangle shape at the bottom of the head.
Step 3: Features
With the body and head in place, it’s time to focus on the facial features of the mouse.
– Draw two small circles for the eyes, slightly below the ears.
– Add a small oval for the nose at the tip of the snout.
– Include whiskers by drawing short lines extending from the sides of the snout.
Step 4: Details
To bring your mouse drawing to life, add details such as fur and tail.
– Create a furry texture by adding short, overlapping lines throughout the body.
– Draw a long, thin tail extending from the back of the mouse.
Step 5: Final Touches
Once you have added all the essential elements, take the time to refine the details and make any necessary adjustments.
– Darken the final lines of the mouse while erasing any unnecessary guidelines.
– Add shading to create depth and dimension, focusing on areas where shadows would naturally fall.
– Consider adding a background or incorporating additional elements to enhance the overall composition of your drawing.
Tips for Drawing a Realistic Mouse:
- Study real-life mouse anatomy to understand their proportions and features better.
- Practice sketching mice from different angles to improve your spatial awareness.
- Experiment with different drawing techniques, such as cross-hatching and stippling, to create texture and depth in your artwork.
Common Mistakes to Avoid:
- Overworking the drawing by adding too many unnecessary details.
- Ignoring proportions and anatomy, resulting in a less realistic portrayal of a mouse.
- Skipping the initial sketching phase, which is crucial for establishing the foundation of the drawing.
Frequently Asked Questions (FAQs):
Q: How can I make my mouse drawing more expressive?
A: Focus on the eyes and facial expression of the mouse to convey emotions effectively. Experiment with different eye shapes and positions to capture the desired expression.
Q: What are some ways to practice drawing mice effectively?
A: Start by sketching simple shapes and gradually adding details. Practice observing real mice or reference images to improve your understanding of their anatomy and features.
Q: Can I use different art mediums to draw a mouse?
A: Yes, feel free to experiment with different mediums such as charcoal, ink, or colored pencils to add variety and interest to your mouse drawings.
Q: How do I achieve a realistic fur texture in my mouse drawing?
A: Focus on creating short, overlapping lines to mimic the appearance of fur. Pay attention to the direction of the lines to follow the natural flow of the mouse’s coat.
Q: Are there any specific techniques for shading a mouse drawing?
A: Use a combination of hatching and cross-hatching to create shadows and depth. Start with light shading and gradually build up the intensity in areas that require more contrast.
Drawing a mouse can be a fun and challenging artistic endeavor that allows you to hone your skills and creativity. By following these step-by-step instructions and tips, you can create a charming and lifelike representation of a mouse that showcases your artistic abilities. Remember to practice regularly and enjoy the process of bringing these adorable creatures to life on paper.